
In the first and second articles of the series 'Programming on Raspberry Pi with Python', we learned how to setup Raspberry Pi, configure WIFI and enable SSH.
In the third article, we created a python script to send the IP address of Raspberry Pi on reboot to a telegram channel and scheduled it in crontab.
Now is the time to start exploring the hardware side of Raspberry Pi. In this article, we will control the LED (light-emitting diode) via GPIO pins of Raspberry Pi by Python program.
Programming on Raspberry Pi with Python: Raspberry Pi Setup
Programming on Raspberry Pi with Python: WIFI and SSH configuration
We are using the Raspberry Pi 3 B+ model.
Requirements:
- Raspberry Pi 3B+
- Jumper wires
- Breadboard
- LED
- Resistors
Understanding GPIO pins:
I strongly recommend you to visit https://www.raspberrypi.org/documentation/usage/gpio/ for better understanding the GPIO pins of your Raspberry Pi.
Alternatively, you can go to the command prompt of your Raspberry Pi and run the command pinout which will present you a handy reference of GPIO pins.
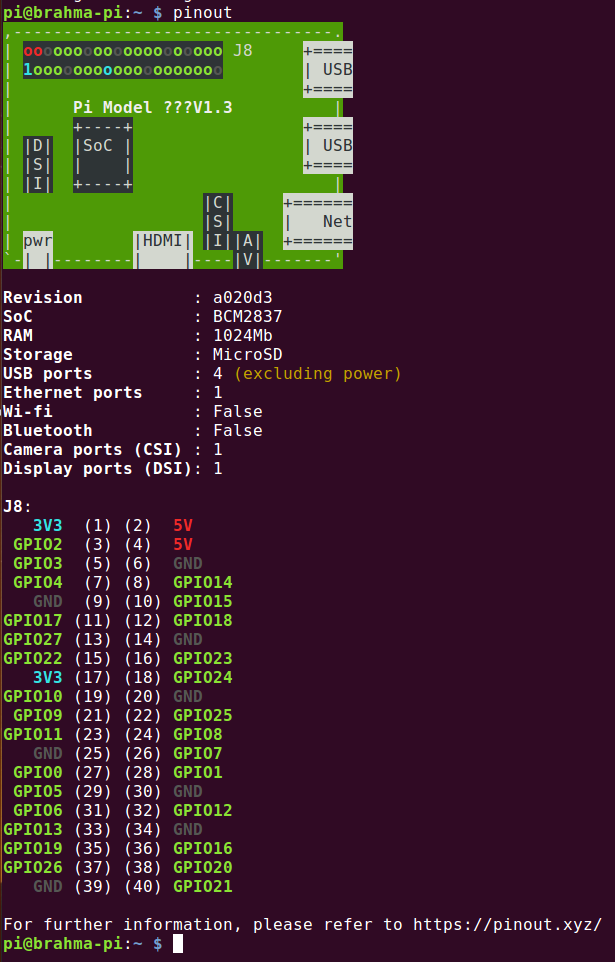
You can refer the instruction card received along with canakit.
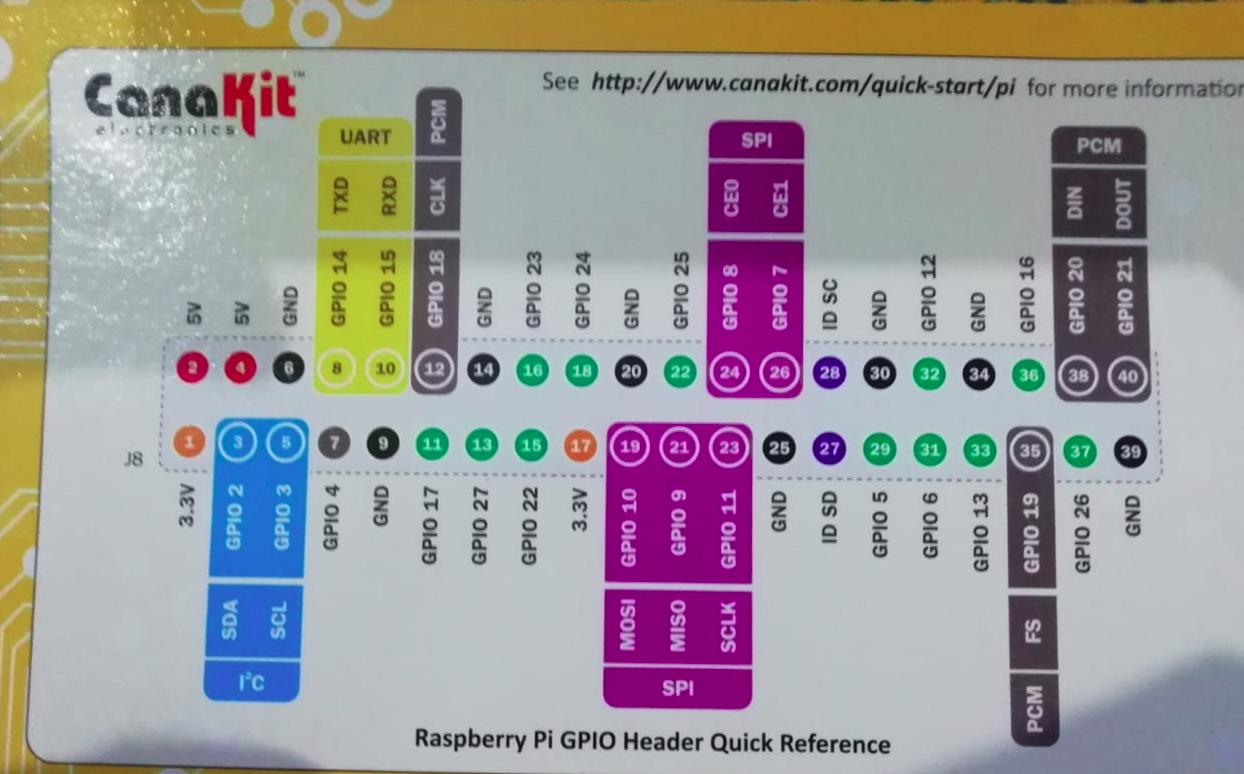
Connections:
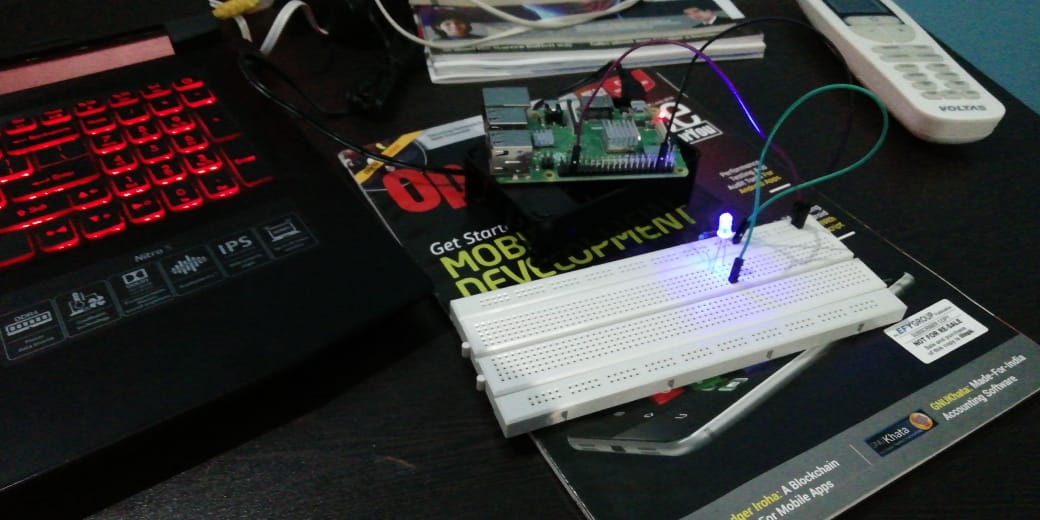
Let's connect the components together.
- Connect pin 36 ( we will refer pins by literal sequence number, here pin 36 is GPIO pin 16 in above pic) with the live/voltage row on the breadboard.
- Connect pin 6 (ground) with ground row on the breadboard.
- Now connect a 220-ohm resistor with live row and the positive terminal of the LED.
- Connect the negative/ground terminal with ground row of the breadboard.
- Use jumper wires for the above connections. Refer my hand-drawn diagram below for connections.
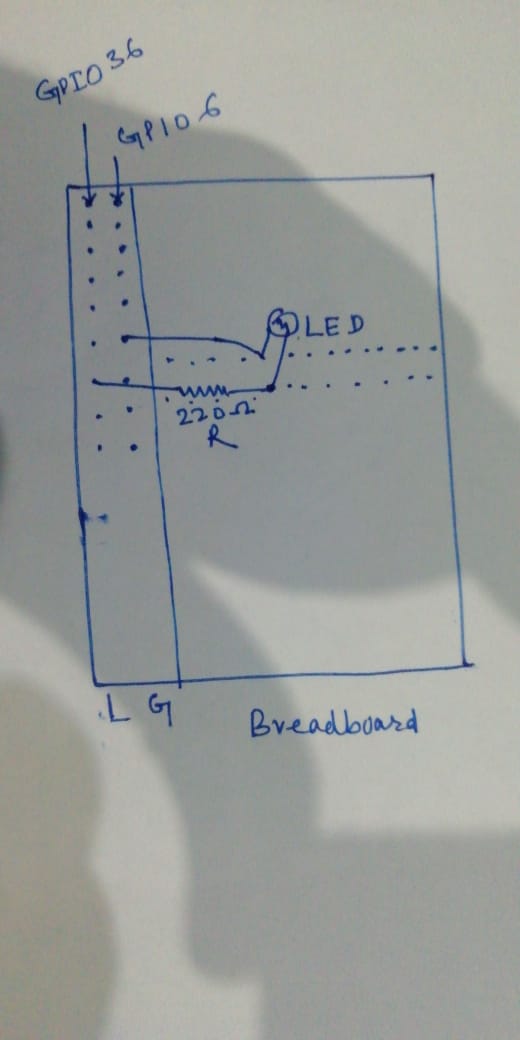
L and G stand for live and ground respectively.
Python Program:
Use below python code to control the LED.
import RPi.GPIO as GPIO
import time

PIN = 36

GPIO.setwarnings(False)
GPIO.setmode(GPIO.BOARD)
GPIO.setup(PIN, GPIO.OUT)         #LED output pin

while True:
    GPIO.output(PIN, 0)  #Turn OFF LED
    time.sleep(1)
    GPIO.output(PIN, 1)  #Turn ON LED
    time.sleep(1)
RPi.GPIO module.PIN.GPIO.BOARD, which means we are referring pin number by their position on board.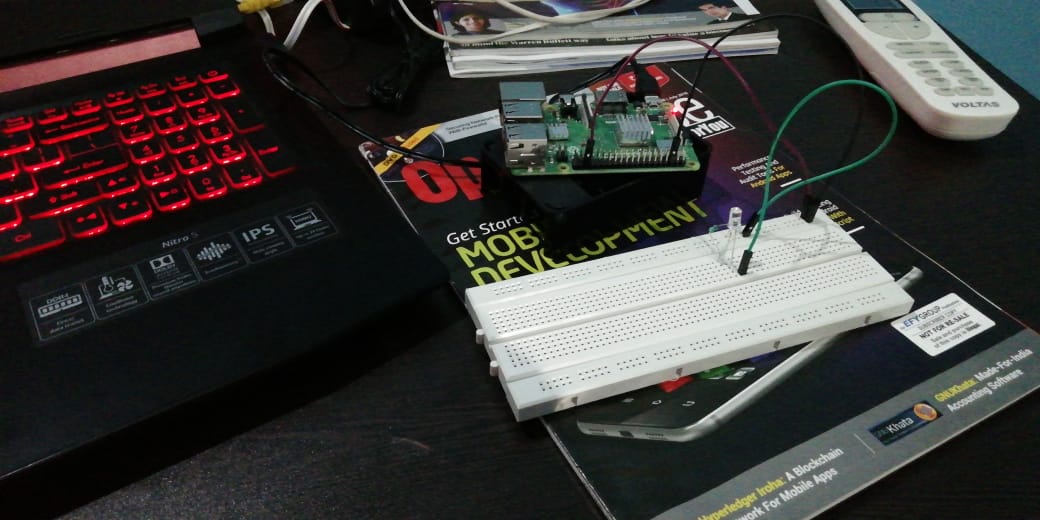
Try it out and if you are stuck anywhere feel free to comment.
Purchase Raspberry Pi Starter Kit Here.
References:

