In previous article we learned how to install Elasticsearch and Kibana and connect them together. In second part of the same article we used Elasticsearch in Django project.
Elasticsearch can be used with relational database or non-relational database. In those articles we used relational database MySQL. In this article we will see how to use MongoDB in Django application.
I use PythonAnyWhere to host Django application quickly. Read here how to host your Django app on PythonAnyWhere for free.
What is MongoDB:
As per Wikipedia -MongoDB is a free and open-source cross-platform document-oriented database program. Classified as a NoSQL database program, MongoDB uses JSON-like documents with schemas.
MongoDB stores data in JSON-like documents. Structure of these documents is flexible, meaning fields can vary from document to document. 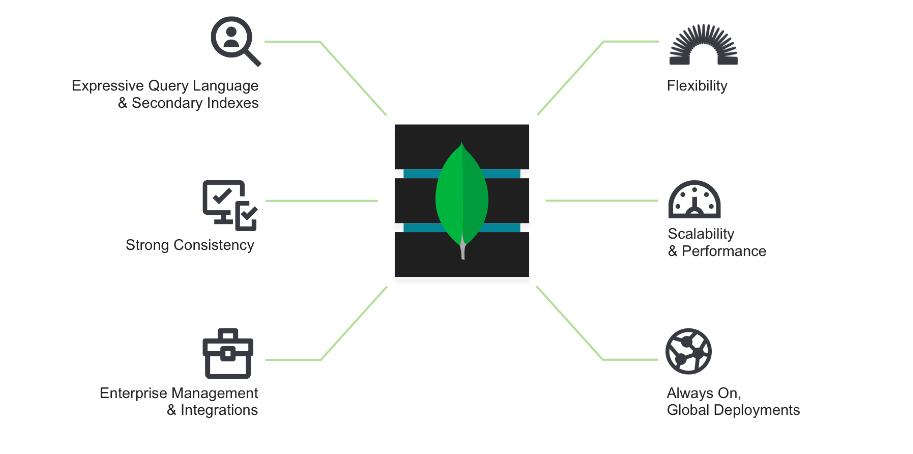 source: http://mongodb.com
Quick Introduction:
Go through these slides to have a quick introduction of MongoDB.Installing MongoDB:
Follow these instructions to install latest stable version of MonboDB on your Ubuntu machine.We need to add MongoDB repository to our server and in order to do that we need to import the key for official MongoDB repository.
sudo apt-key adv --keyserver hkp://keyserver.ubuntu.com:80 --recv EA312927
Add MongoDB repository to package list so that apt know the location to download from.
echo "deb http://repo.mongodb.org/apt/ubuntu xenial/mongodb-org/3.2 multiverse" | sudo tee /etc/apt/sources.list.d/mongodb-org-3.2.list
Update the package list and install MongoDB.
sudo apt-get update && sudo apt-get install -y mongodb-org
MongoDB log files are created in /var/log/mongodb and data files in /var/lib/mongodb directory. These settings are defined in /etc/mongod.conf file.
Starting MongoDB:
After installation is complete, start the MongoDB.sudo systemctl start mongod
Keep an eye on /var/log and if it says 'waiting for connection on port 27017' that means MongoDB is ready.
2017-12-11T22:39:23.783+0530 I NETWORK  [HostnameCanonicalizationWorker] Starting hostname canonicalization worker
2017-12-11T22:39:23.783+0530 I FTDC     [initandlisten] Initializing full-time diagnostic data capture with directory '/var/lib/mongodb/diagnostic.data'
2017-12-11T22:39:23.783+0530 I NETWORK  [initandlisten] waiting for connections on port 27017
You can check the status of MongoDB using below command as well.
sudo systemctl status mongodb
You might face some issues while starting MongoDB. Make sure you create a systemctl file /etc/systemd/system/mongodb.service with below content in it.
[Unit]
Description=High-performance, schema-free document-oriented database
After=network.target

[Service]
User=mongodb
ExecStart=/usr/bin/mongod --quiet --config /etc/mongod.conf

[Install]
WantedBy=multi-user.target
If you try to go to URL 127.0.0.1:27017 in your browser you will get below message.

To start the MongoDB automatically on system startup, run below command.
sudo systemctl enable mongodb
MongoDB Shell:
Lets quickly try your hands on MongoDB shell.
Fire up the Mongo. Command is mongo. To see the list of available commands type help . 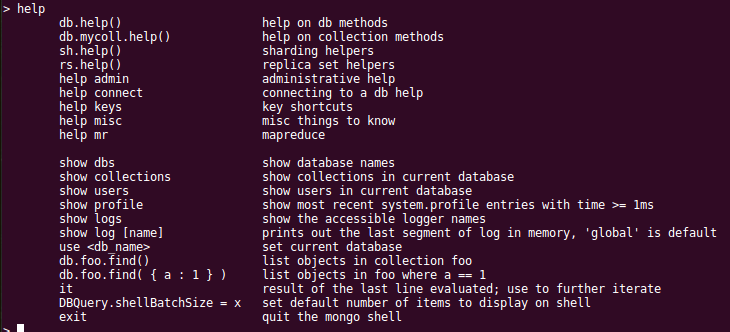
show dbs command will list the available DBs in MongoDB. Any database or collection or document is created at runtime if doesn't exists already.
Inserting data in document:
First we need to choose a DB to work upon. Don't worry if DB is not already created. As I said earlier, it will be created at runtime.
> use testdb
switched to db testdb
Now insert data in this DB. Insert statement will create a new document in the collection provided.
> db.my_collection.insert({"a":"b"})
WriteResult({ "nInserted" : 1 })
Fetching Data:
Use command find() over a collection to fetch all documents in that collection.
> db.my_collection.find()
{ "_id" : ObjectId("5a2f84815acbd9a565f83868"), "a" : "b" }
Bulk Insert:
You can create multiple documents in one go.
> db.test_collections.insert([{"a":"b","c":"d"},{"b":"f"}])
BulkWriteResult({
	"writeErrors" : [ ],
	"writeConcernErrors" : [ ],
	"nInserted" : 2,
	"nUpserted" : 0,
	"nMatched" : 0,
	"nModified" : 0,
	"nRemoved" : 0,
	"upserted" : [ ]
})
> db.test_collections.find()
{ "_id" : ObjectId("5a2f576c5acbd9a565f83864"), "a" : "b" }
{ "_id" : ObjectId("5a2f57945acbd9a565f83865"), "a" : "b", "c" : "d" }
{ "_id" : ObjectId("5a2f57b75acbd9a565f83866"), "a" : "b", "c" : "d" }
{ "_id" : ObjectId("5a2f57b75acbd9a565f83867"), "b" : "f" }
If you do not pass _id key than it is automatically created.
> db.my_collection.insert({"_id":23,"a":"b"})
WriteResult({ "nInserted" : 1 })

> db.my_collection.find()
{ "_id" : ObjectId("5a2f84815acbd9a565f83868"), "a" : "b" }
{ "_id" : ObjectId("5a2f857d5acbd9a565f83869"), "id" : 23, "a" : "b" }
{ "_id" : 23, "a" : "b" }
You can search a specific document by passing the key value pair in find.
> db.my_collection.find({_id : 23})
{ "_id" : 23, "a" : "b" }
Read more about the shell operations here.
Using MongoDB in Django App:
We will be using MongoEngine which is a Document-Object Mapper for working with MongoDB from Python.Now create a Django Project. This article explains how to start with Django. I recommend to use virtual environment.
Please install mongoengine package using pip.
Complete code of Django project I have used below as example is available on Github. All the dependencies are present in req.txt file in base directory. Install all the dependencies using below command.
pip install -r req.txt
Complete the initial setup of your project and then complete the below steps one by one:
Create a new app mongoapp. Create a urls file in this app. Include this url file in project urls file.
from django.conf.urls import url
from django.contrib import admin
from django.conf.urls import include

urlpatterns = [
    url(r'^admin/', admin.site.urls),
    url(r'^mongoapp/', include('mongoapp.urls', namespace='mongoapp')),
]
Define models in mongoapp/models.py file.
from mongoengine import *

connect('PollsDB')

class ChoiceModel(EmbeddedDocument):
    choice_text = StringField(max_length=200)
    votes = IntField(default=0)


class PollModel(Document):
    question = StringField(max_length=200)
    pub_date = DateTimeField(help_text='date published')
    choices = ListField(EmbeddedDocumentField(ChoiceModel))
Add urls in mongoapp/urls.py file.
from django.conf.urls import url
from mongoapp import views

app_name = "mongoapp"
urlpatterns = [
    url(r'^$', views.index, name='index'),
    url(r'^create/$', views.create, name='create'),
    url(r'^show/$', views.show, name='show'),
    url(r'^delete/(?P<document_id>[a-z0-9]*)/$', views.delete, name='delete'),
]
Now define functions in your mongoapp/views.py file.
from mongoapp.models import PollModel, ChoiceModel
import datetime
from django.shortcuts import render, redirect
from django.http import HttpResponse, HttpResponseRedirect
from django.core.urlresolvers import reverse


def index(request):
    data = {}
    return render(request,"mongoapp/index.html",data)


def create(request):
    choice1 = ChoiceModel(choice_text="option a", votes=20)
    choice2 = ChoiceModel(choice_text="option a", votes=12)
    choice3 = ChoiceModel(choice_text="option a", votes=9)
    choice4 = ChoiceModel(choice_text="option a", votes=21)

    choices = [choice1, choice2, choice3, choice4]

    poll = PollModel(question="This is a sample question", pub_date=datetime.datetime.now(), choices=choices)
    poll.save()

    poll = PollModel(question="This is another sample question with same choices", pub_date=datetime.datetime.now(),
                     choices=choices)
    poll.save()

    return HttpResponseRedirect(reverse("mongoapp:show"))


def show(request):
    data = {}
    p = PollModel.objects.all()
    data["polls"] = p
    return render(request, "mongoapp/show.html", data)


def delete(request, document_id):
    PollModel.objects.filter(id=document_id).delete()
    return HttpResponseRedirect(reverse("mongoapp:show"))
Code above is self explanatory if you are familiar with Django.
Create templates in templates/mongoapp/ directory.
<a href="{% url "mongoapp:create" %}">Create document</a><br>
<a href="{% url "mongoapp:show" %}">Show documents</a><br>
show.html
{% for poll in polls%}
Document ID: {{poll.id}} <br>
Question:  {{poll.question}} <br>
Published Date: {{poll.pub_date}} <br>
Options:<br>
    {% for choice in poll.choices %}
    {{choice.choice_text}} : {{choice.votes}} <br>
    {% endfor %}
<a href="{% url "mongoapp:delete" poll.id %}">Delete</a>
<hr>
{% endfor %}
Congratulations! your code is ready. Restart the Django server.
Go to localhost:8000/mongoapp.
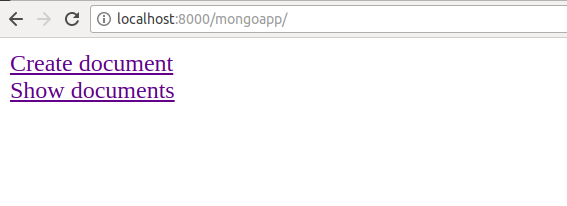 If you click on show documents before creating document, then nothing will be displayed. So first click the 'create document link'.
It will execute the code in create function of views.py file.
After creating document, browser redirects to show page where you can see the just created documents.
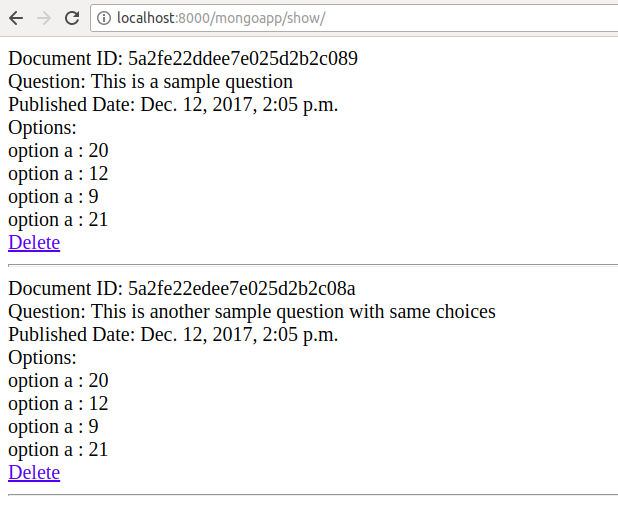
You can verify the same from command line.
rana@Brahma: mongoexample$ mongo
MongoDB shell version: 3.2.18
connecting to: test
Server has startup warnings:
2017-12-12T09:29:53.694+0530 I CONTROL  [initandlisten]
2017-12-12T09:29:53.694+0530 I CONTROL  [initandlisten] ** WARNING: /sys/kernel/mm/transparent_hugepage/enabled is 'always'.
2017-12-12T09:29:53.694+0530 I CONTROL  [initandlisten] **        We suggest setting it to 'never'
2017-12-12T09:29:53.694+0530 I CONTROL  [initandlisten]
2017-12-12T09:29:53.694+0530 I CONTROL  [initandlisten] ** WARNING: /sys/kernel/mm/transparent_hugepage/defrag is 'always'.
2017-12-12T09:29:53.694+0530 I CONTROL  [initandlisten] **        We suggest setting it to 'never'
2017-12-12T09:29:53.694+0530 I CONTROL  [initandlisten]
> show dbs
PollsDB  0.000GB
local    0.000GB
test     0.000GB
testdb   0.000GB
> use PollsDB
switched to db PollsDB
> show collections
poll_model
> db.poll_model.find()
{ "_id" : ObjectId("5a2fe22ddee7e025d2b2c089"), "question" : "This is a sample question", "pub_date" : ISODate("2017-12-12T14:05:33.594Z"), "choices" : [ { "choice_text" : "option a", "votes" : 20 }, { "choice_text" : "option a", "votes" : 12 }, { "choice_text" : "option a", "votes" : 9 }, { "choice_text" : "option a", "votes" : 21 } ] }
{ "_id" : ObjectId("5a2fe22edee7e025d2b2c08a"), "question" : "This is another sample question with same choices", "pub_date" : ISODate("2017-12-12T14:05:34.103Z"), "choices" : [ { "choice_text" : "option a", "votes" : 20 }, { "choice_text" : "option a", "votes" : 12 }, { "choice_text" : "option a", "votes" : 9 }, { "choice_text" : "option a", "votes" : 21 } ] }
>
Clicking delete link will remove the document from the MongoDB.
Dynamic Document Schema:
So far we created models with fixed schema just like relational databases. One of the benefits of MongoDB is dynamic schema. Although Explicit is better than implicit, there are few scenarios where dynamic schema is desirable.
Update mongoapp/models.py to add new model.
class DynamicPageModel(DynamicDocument):
    title = StringField(max_length=150, required=True)
Add a new url pattern in
mongoapp/urls.py file
url(r'^create_dynamic/$', views.create_dynamic, name='create_dynamic'),
Add the function create_dynamic in mongoapp/views.py file which will create a dynamic document.
def create_dynamic(request):
    dynamic_page = DynamicPageModel(title="this is sample title")
    dynamic_page.category = "category1"
    dynamic_page.tags = ["tag1", "tag2"]
    dynamic_page.save()
    return HttpResponseRedirect(reverse("mongoapp:show"))
Now navigating to the http://localhost:8000/mongoapp/create_dynamic/ url will create a new dynamic schema document. You will see the new document on show page. 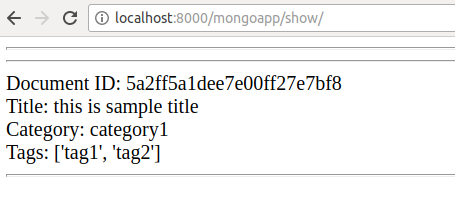
Same can also be verifies in terminal.
> show dbs
PollsDB  0.000GB
local    0.000GB
test     0.000GB
testdb   0.000GB
> use PollsDB
switched to db PollsDB
> show collections
dynamic_page_model
poll_model
> db.dynamic_page_model.find()
{ "_id" : ObjectId("5a2ff5a1dee7e00ff27e7bf8"), "title" : "this is sample title", "category" : "category1", "tags" : [ "tag1", "tag2" ] }
>
This was a basic introduction to MongoDB and how to use it in Django application.
You may refer the below mentioned reference links to learn more about it.
Happy learning.
Before you leave, please go through this article : https://www.pydanny.com/when-to-use-mongodb-with-django.html
References:
[1] https://www.ibm.com/developerworks/library/os-django-mongo/
[2] http://docs.mongoengine.org
[3] http://mongoengine.org
[4] https://staltz.com/djangoconfi-mongoengine/
[5] https://www.digitalocean.com/community/tutorials/how-to-install-mongodb-on-ubuntu-16-04

